Install PostgreSQL
Prerequisite
For Kylin, we recommend using PostgreSQL as the default metastore database. The PostgreSQL 10.7 installation package is located in the product package root directory
postgresql.If using other versions of PostgreSQL, please choose a version above PostgreSQL 9.1.
The PostgreSQL installation package currently supports installation in CentOS system, the correspondence is as follows:
rhel6.x86_64.rpm-> CentOS 6rhel7.x86_64.rpm-> CentOS 7rhel8.x86_64.rpm-> CentOS 8
Please check out Linux version before choosing the installation package. You should be able to see your Linux core version by running
uname -aorcat /etc/issue.Note: other system compatible package please refer to PostgreSQL Website.
In this section, we will go through a PostgreSQL installation and configuration on CentOS 6.
root User Installation and Configuration
After unzipping the Kylin package, enter the root directory
sbinand run following commands in order to download PostgreSQL../download_postgresql.shAfter unzipping the Kylin package, enter the root directory
postgresqland run following commands in order to install PostgreSQL.rpm -ivh postgresql10-libs-10.7-1PGDG.rhel6.x86_64.rpm
rpm -ivh postgresql10-10.7-1PGDG.rhel6.x86_64.rpm
rpm -ivh postgresql10-server-10.7-1PGDG.rhel6.x86_64.rpmInitialize PostgreSQL
The OS has installed Initscripts services, Please run:
service postgresql-10 initdbThe OS not has installed Initscripts services, Please run in the PostgreSQL bin directory:
$PGSQL_HOME/pgsql-10/bin/postgresql-10-setup initdb
for example: /user/pgsql-10/bin/postgresql-10-setup initdb
Modify two PostgreSQL configuration files, the files are in
/var/lib/pgsql/10/data/:pg_hba.conf: mainly used to store the authentication information of the client.postgresql.conf
i. Run
vi pg_hba.confto open the file and you can see the following initial setting:host all all 127.0.0.1/32 identPlease the change the above setting to the following:
host all all 127.0.0.1/32 md5tips: The above modification makes you match any users in localhost (IP address is
localhostor127.0.0.1) to connect any databases and validate user password viamd5.At the same time, please append a new line at the end of this file:
host all all 0.0.0.0/0 md5tips: The above modification makes you match any user in any IPV4 address to connect any databases, and validate user password via
md5.Fields Explanation:
host: The connect way,hostmeans connecting via TCP / IP;- First
all: Match all databases; - Second
all: Match all users; 0.0.0.0/0: Match all IPV4 address;md5: Validate viamd5.
tips: You can set corresponding match rules according to your cases.
ii. Run
vi postgresql.confto open another configuration file and modify the following properties:listen_addresses = '*'Field Explanation:
listen_addresses: Specify the TCP / IP address listened by server. It is represented by multiple hostnames seperated by comma, for intance,listen_addresses = host1,host2,host3orlisten_address = 10.1.1.1,10.1.1.2,10.1.1.3. The special symbol*matches all IP addresses. You can modify the property on demands.port: The default value is5432. If5432is taken, please replace it with an avaliable port.
Run
service postgresql-10 startto launch PostgreSQLLog in to PostgreSQL and create the database
i. Run
su - postgresto switch topostgresuser.Tip:
postgresis automatically created by Linux user in the process of PostgreSQL installation.ii. Run
/usr/pgsql-10/bin/psqlto connect PostgreSQL server.The command above will connect to port
5432by default. If you have changed port number in configuration filepostgresql.conf, please use-poption indicating the port number you set before. For instance, say you set port number as5433inpostgresql.conffile, please run as/usr/pgsql-10/bin/psql -p 5433.iii. Kylin uses
postgresas user name to connect PostgreSQL by default, you are required to set password for userpostgres. RunALTER USER postgres PASSWORD 'kylin';to set user password tokylin.Note: Please do not forget
;at the end of the command.iv. Run
create database kylin;to create the metadata database, named askylinby default.Note: Please do not forget
;at the end of the command.v. Run
\lto check if the database was created successfully. If you see picture as below, you have just created a database namedkylin.
Non root User Installation and Configuration
The following example is that Linux user abc installs and configures PostgreSQL.
Create a new directory
/home/abc/postgresql, then unzip the PostgreSQL installation package.rpm2cpio postgresql10-libs-10.7-1PGDG.rhel6.x86_64.rpm | cpio -idmv
rpm2cpio postgresql10-10.7-1PGDG.rhel6.x86_64.rpm | cpio -idmv
rpm2cpio postgresql10-server-10.7-1PGDG.rhel6.x86_64.rpm | cpio -idmvNote: please make sure user
abchas read and write privileges.Edit
~/.bash_profilefile, appendexport LD_LIBRARY_PATH=/home/abc/postgresql/usr/pgsql-10/libat the end of the file, then runsource ~/.bash_profileto make it take effect.Configure database
i. Run the following command to initialize database:
~/postgresql/usr/pgsql-10/bin/initdb -A md5 -U postgres -W -D ~/postgresql/var/lib/pgsql/10/data/Fields explanation:
- -A md5: validate user password via
md5 - -U postgres: specify user
postgres - -W: set password for user
postgres - -D ~/postgresql/var/lib/pgsql/10/data/: specify the path where the configuration file is located
As the picture shows below, input password after run the command above, the password is the password for user
postgres, say the password iskylin.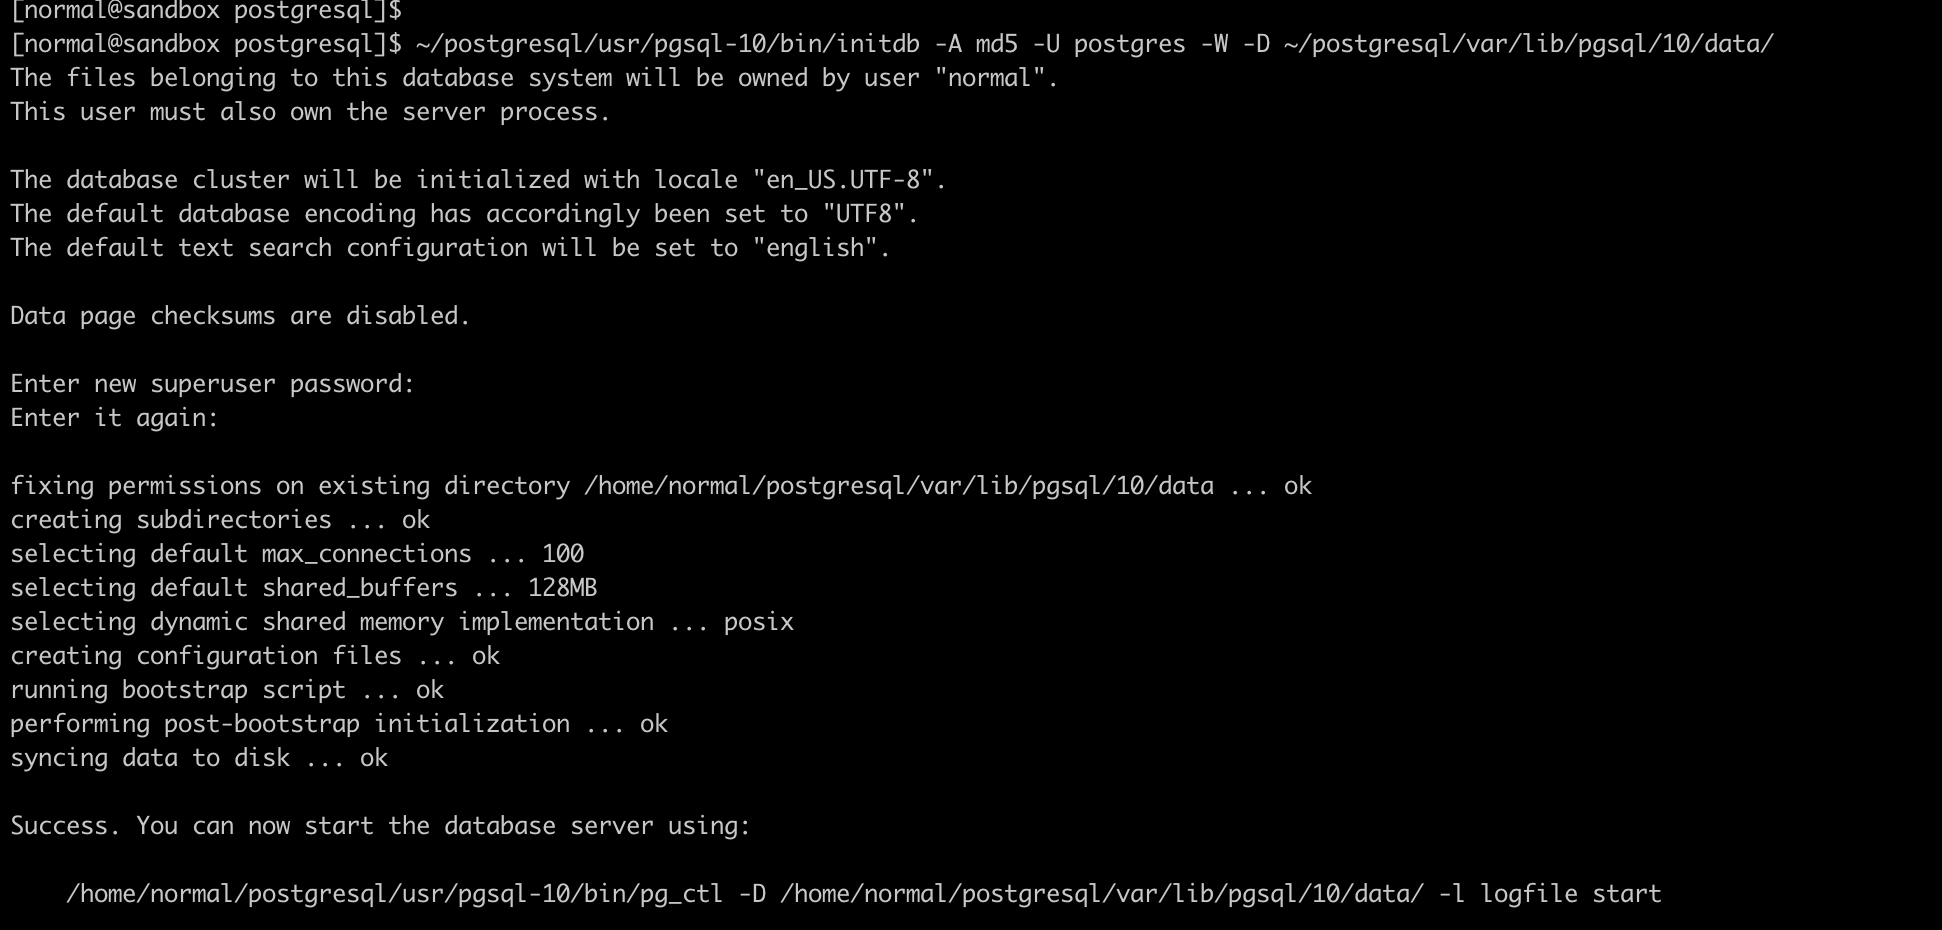
ii. Edit configuration file
Step 1: Create the directory for Unix Socket communication via the command below:
mkdir ~/postgresql/socketStep 2: Modify the configuration file
~/postgresql/var/lib/pgsql/10/data/postgresql.conf:listen_addresses = '*'
unix_socket_directories = '/home/abc/postgresql'
#port = 5432Note: please make sure current user has read and write privileges on Unit Socket communication directory
/home/abc/postgresql.Step 3: Please append the following line at the end of
~/postgresql/var/lib/pgsql/10/data/pg_hba.confconfiguration file:host all all 0.0.0.0/0 md5- -A md5: validate user password via
Run the following command to launch PostgreSQL:
~/postgresql/usr/pgsql-10/bin/pg_ctl -D ~/postgresql/var/lib/pgsql/10/data/ -l ~/postgresql/var/lib/pgsql/10/pgstartup.log startRun the following command to connect PostgreSQL:
~/postgresql/usr/pgsql-10/bin/psql -U postgres -h localhostThe above command will connects to
5432port. If you modified the setting in configuration, please add-poption and set the port. Say you set the port number inpostgresql.confto5436, please run following command:~/postgresql/usr/pgsql-10/bin/psql -U postgres -h localhost -p 5436After that, please input password as prompted.
Run the following command to create a database named
kylin:create database kylin;Note:
- Please do not forget to append
;at the end of the command. - You can check if
kylindatabase was created successfully via\lcommand in PostgreSQL client.
- Please do not forget to append
FAQ
Q: How to solve the error libicu18n.so.42: cannot open shared object file: no such file or directory when a non-root user initializes PostgreSQL?
There are two solutions:
Solution 1: Make sure that the node installing PostgreSQL can access the external network, and then enter the command yum install libicu-devel in the terminal to download libicui18n.
Solution 2: Visit the website https://pkgs.org/download/libicu and download the required packages. Please choose the appropriate version according to the system kernel, such as libicu-4.2.1-1.el6.x86_64.rpm for CentOS 6. Then use the command rpm2cpio libicu-4.2.1-14.el6.x86_64.rpm | cpio -idmv to decompress the binary package and place the decompressed content in $LD_LIBRARY_PATH. If you don't know $LD_LIBRARY_PATH, please refer to the second step of Non root User Installation And Configuration above.